My Blinkies


Stuff


Designers I CT for


Blogs I support

CU Licenses I hold


Networked Blog

Blogroll
-
-
Still around and still busy2 weeks ago
-
Midnight Garden Blog Train Freebie!3 weeks ago
-
Dayz of Summer - Tagger10 months ago
-
-
Country Christmas 20202 years ago
-
Blessed2 years ago
-
-
-
StellaFelice7 Taggies6 years ago
-
February 2020 New Releases6 years ago
-
-
MB&SW Masks 126 and 1276 years ago
-
MASKS #21 and 227 years ago
-
-
CA Girl Exclusive - kit8 years ago
-
-
-
PTU KIT SUMMER CITRUS10 years ago
-
STORE CLOSING DOWN SALE11 years ago
-
Gothic Ashley CT Results11 years ago
-
Rocking Shamrocks11 years ago
-
HELLO AND HAPPY NEW YEAR11 years ago
-
-
Glorious Autumn11 years ago
-
Announcement12 years ago
-
4 New Animations12 years ago
-
New Packs/Kits up in Zone Store ..12 years ago
-
New kit!! "Girlie Girl"12 years ago
-
***Dnscraps, Little Crown***12 years ago
-
"Hope for Brady" 2013 Blog Train!13 years ago
-
Lucky Me - Tagger Size13 years ago
-
Sweet Love PTU13 years ago
-
sassandswagtemps13 years ago
-
CT Tag and New Template13 years ago
-
Serg Grafik satc “All You Need is Love”13 years ago
-
Sexy Biker Babe - Kit By NAC13 years ago
-
Pirates Wanted - tag13 years ago
-
SWA is Re-Opening !14 years ago
-
Blogwear Design TOU14 years ago
-
-
♥Miraculous Moment♥15 years ago
-
-
-
-
-
-
-
-
-
-


Tuesday, August 17, 2010
Lost Love...

This tutorial is written for those with a working knowledge of PSP.
I use version 9 but any should work.
Supplies used:
Scrap kit of choice I chose: ~Casualties of love~ by Black Widow Exclusives
Tube of Choice I chose the artwork of ©Anna Marine Which requires a license you may purchase at CILM
Mask of choice: I used mask 363 by WeeScotLass
Font of Choice I chose: Shelley Script LT
Now let's get started
Open a new image 750X750
Choose a paper from your kit I used paper 14 copy and paste into your image
apply your chosen mask by clicking layers load/save mask and choosing your mask
then you merge the mask layer by clicking merge, then merge group
Now you click on Selections select all, float, de-float, and I used element 13
without resizing it copy and paste into your image arrange as you like (you may use my tag as an example)
then invert delete then invert again and you may place your tube into the image
then invert delete and select none.
Now I went back and added drop shadows to both the element and tube I used 3, 3, 90, 12.0
Next you may add elements of choice to suit your tag I chose element 31, move behind the tube and first element and added the same drop shadow
duplicate and mirror... arrange as desired to suit your tube
then I went back to my mask layer and selected all, float, de-floated again and added Element 11 in the upper left corner invert, delete select none.
Next add element 22 and arrange as desired add the same drop shadow then duplicate and mirror.
Next add element 32 arrange as you choose then duplicate and mirror
Now add your copyright and name, re-size and you are done
Sunday, August 15, 2010
Serenity...

This tutorial is written for those with a working knowledge of PSP.
I use version 9 but any version should work.
Supplies you will need:
A mask of choice, I chose mask 190 by WeeScotLass which you may find here.
A scrap kit of choice, I used a PTU kit called Serenity by Stacey's Designs
A tube of choice:I chose the Art work of ©Angie Monasterio which requires a license you may purchase at CILM
Animation shop if you choose to animate.
Open a new image 750x750 You may re-size later.
Choose a paper from your kit, I chose paper 1 copy and paste as a new layer into your image
Next you load your mask from disk then click on the group, merge, merge group
Now you may add your tube of choice and adjust using the deform tool to fit your mask.
Add a drop shadow of choice, I used -2, -2, 90,11.0.
Now comes the fun part adding your embellishments.
I chose the candle re-sized @35 then again @ 20 and arranged in a grouping
Then I chose the flower and the purple flower each re-sized 35 also
arranged around the candle grouping each layer with a drop shadow of 2, 2, 100, 10
you may duplicate each layer as desired for placement.
Next I chose the heart links with a 1, 1, 100, 10 and duplicated the layer.
Next I added the butterfly pendant with the same drop shadow.
Next I re-sized the Dangle 30 and added near the heart pendant drop shadowed 1, 1, 100, 10
free rotated 15 to the left then duplicated and free rotated 25 to the right
next I used the erase tool to erase bits for effect.
You may re-size and add your copyright now.
Add your name and you are done unless you will animate.
If you choose to animate: go to your first candle layer, using your wand tool highlight the flame area as desired then duplicate the layer twice.
go back to the first layer and go to effects, distortion effects then punch I used 15 on the first layer,
then I repeated the steps on each of the other layers using 75 on the second layer and 100 on the last.
Since I used more than on candle I repeated each of the steps on candles 2 and 3.
On Candle 2 I used 20 on the first layer, 60 on the second layer and 80 on the third.
On candle 3 I used 30 on the first layer, 50, on the second layer, and 90 on the third.
Now ex-ing out layers 2 & 3 on all of your candle layers (all original candle layers should be visible)
copy merged and move to animation shop
Now ex-ing out original layer and layer three (all layer 2 candle should be visible)
copy merged and and paste after current frame in animation shop.
Again ex-ing out original layer and layer 2 (all layer 3 candles should be visible)
copy merge and paste after current frame.
Save the animation, and you are done.
go to your first candle layer, using your wand tool highlight the flame area as desired then duplicate the layer twice.
go back to the first layer and go to effects, distortion effects then punch I used 15 on the first layer,
then I repeated the steps on each of the other layers using 75 on the second layer and 100 on the last.
Since I used more than on candle I repeated each of the steps on candles 2 and 3.
On Candle 2 I used 20 on the first layer, 60 on the second layer and 80 on the third.
On candle 3 I used 30 on the first layer, 50, on the second layer, and 90 on the third.
Now ex-ing out layers 2 & 3 on all of your candle layers (all original candle layers should be visible)
copy merged and move to animation shop
Now ex-ing out original layer and layer three (all layer 2 candle should be visible)
copy merged and and paste after current frame in animation shop.
Again ex-ing out original layer and layer 2 (all layer 3 candles should be visible)
copy merge and paste after current frame.
Save the animation, and you are done.
 go to your first candle layer, using your wand tool highlight the flame area as desired then duplicate the layer twice.
go back to the first layer and go to effects, distortion effects then punch I used 15 on the first layer,
then I repeated the steps on each of the other layers using 75 on the second layer and 100 on the last.
Since I used more than on candle I repeated each of the steps on candles 2 and 3.
On Candle 2 I used 20 on the first layer, 60 on the second layer and 80 on the third.
On candle 3 I used 30 on the first layer, 50, on the second layer, and 90 on the third.
Now ex-ing out layers 2 & 3 on all of your candle layers (all original candle layers should be visible)
copy merged and move to animation shop
Now ex-ing out original layer and layer three (all layer 2 candle should be visible)
copy merged and and paste after current frame in animation shop.
Again ex-ing out original layer and layer 2 (all layer 3 candles should be visible)
copy merge and paste after current frame.
Save the animation, and you are done.
go to your first candle layer, using your wand tool highlight the flame area as desired then duplicate the layer twice.
go back to the first layer and go to effects, distortion effects then punch I used 15 on the first layer,
then I repeated the steps on each of the other layers using 75 on the second layer and 100 on the last.
Since I used more than on candle I repeated each of the steps on candles 2 and 3.
On Candle 2 I used 20 on the first layer, 60 on the second layer and 80 on the third.
On candle 3 I used 30 on the first layer, 50, on the second layer, and 90 on the third.
Now ex-ing out layers 2 & 3 on all of your candle layers (all original candle layers should be visible)
copy merged and move to animation shop
Now ex-ing out original layer and layer three (all layer 2 candle should be visible)
copy merged and and paste after current frame in animation shop.
Again ex-ing out original layer and layer 2 (all layer 3 candles should be visible)
copy merge and paste after current frame.
Save the animation, and you are done.
Tuesday, August 3, 2010
Love Letters

This tut was written by me and any resemblance to any other is purely coincidental
this tutorial is for those with a working knowledge of PSP.
Supplies used:
Scrap-kit from Bluedream Designs ~~Valentine~~
Artwork: by Zindy You need a license to use her art you may purchase one HERE
Font: Zoe
Mask of choice: I used a mask labeled 179 I'm not sure where it came from but if it is yours please let me know so I can credit you
Open a frame I used Frame 1 duplicate (Shift D) then close the original.
Re-size your canvas 750 X750
Click inside the frame using you wand tool then Selection, modify expand by 3
Copy a paper of choice I used paper 1 and paste as a new layer invert, delete, select none
Move paper under the frame layer, and add a drop shadow to your frame now(I used 2,2,90,8)
create a new raster flood fill with a color from your tube or any elements you choose
apply your mask merge group
create another raster flood fill with another color from either your tube or elements apply your mask
merge group then flip and re-size 110
Paste your tube underneath your frame layer and re-size to fit. Add a drop shadow of choice (I used 2, 2, 80, 9)
Now it is time to add your embellishments.
I chose Butterfly one with a drop shadow of -2,-2, 80,8 re-sized 90
Then I chose Diamond doodle 1 with a drop shadow 2,2,80,2
then duplicate layer and flip then mirror merge and
place under the paper layer but above both mask layers
Then I chose one each of the envelopes using the same drop shadows as listed above Re-sized 65
I chose pen one with the same drop shadow re-sized 65
Then I chose Rose2 and pearls2 I used the deform tool to
re-size these and Bow 1 using a variation of my drop shadows in combination
add your copyright , re-size as desired and add your name you now have a new tag!!
Cameo

This tutorial is meant for those that have a working knowledge of PSP.
This tutorial was written by me and any resemblance to any other is purely coincidental.
Supplies you will need
I used PSP 9, but any version should do.
You will need a tube of choice I chose the Artwork of Jamie Kidd
You need a license to use her work, you may purchase it from CILM
A scrap kit of choice, I'm using a PTU kit from Juicy Bits
Sophisticated you may purchase it HERE
Eye Candy 4000 ~ Gradient Glow
Font of choice, I used AlexBrush
Open a frame from your kit, in this case I chose the oval frame duplicate (Shift D) and close the original
Re-size the frame by 150 (if using this kit), then re-size the canvas to as you may need (I re-sized to 649 X851)
click inside the frame using your wand tool click selection, modify, expand by 3 choose a paper from your kit
(I chose paper 10 and I adjusted the hue & colorized)
 paste as a new layer invert then delete
Move the paper layer under your frame layer. You should add a drop shadow of choice to the frame now (I used 2, 2, 80, 9)
Copy and past your tube inside of the frame then move the tube layer underneath the frame. Add the drop shadow of choice I used 2, 2, 80, 9 then -2, -2, 80, 9. Then I used the plug-in Eye Candy Gradient glow using the below settings ( 3, 25, 83, 50 on the opacity under color).
paste as a new layer invert then delete
Move the paper layer under your frame layer. You should add a drop shadow of choice to the frame now (I used 2, 2, 80, 9)
Copy and past your tube inside of the frame then move the tube layer underneath the frame. Add the drop shadow of choice I used 2, 2, 80, 9 then -2, -2, 80, 9. Then I used the plug-in Eye Candy Gradient glow using the below settings ( 3, 25, 83, 50 on the opacity under color).

 Now comes the fun part choosing and positioning your elements. I started with the flourish and used the deform tool to re-size and position
place below the paper frame, duplicate and position toward the bottom of the frame, use my tags as a guide if you like
Ribbon 4 adjusted the hue and colorized then used the deform tool to re-size and place,
I used gradient glow to match what was used on the tube, then duplicated it and mirrored and
flipped it and placed under at the top the flourish use my tag as a guide
Then Butterfly 2 re-sized 45, rotated using the deform tool then the same gradient glow as above.
Re-size as you like,
Add your copyright information and your name and you are done!
Now comes the fun part choosing and positioning your elements. I started with the flourish and used the deform tool to re-size and position
place below the paper frame, duplicate and position toward the bottom of the frame, use my tags as a guide if you like
Ribbon 4 adjusted the hue and colorized then used the deform tool to re-size and place,
I used gradient glow to match what was used on the tube, then duplicated it and mirrored and
flipped it and placed under at the top the flourish use my tag as a guide
Then Butterfly 2 re-sized 45, rotated using the deform tool then the same gradient glow as above.
Re-size as you like,
Add your copyright information and your name and you are done!
 paste as a new layer invert then delete
Move the paper layer under your frame layer. You should add a drop shadow of choice to the frame now (I used 2, 2, 80, 9)
Copy and past your tube inside of the frame then move the tube layer underneath the frame. Add the drop shadow of choice I used 2, 2, 80, 9 then -2, -2, 80, 9. Then I used the plug-in Eye Candy Gradient glow using the below settings ( 3, 25, 83, 50 on the opacity under color).
paste as a new layer invert then delete
Move the paper layer under your frame layer. You should add a drop shadow of choice to the frame now (I used 2, 2, 80, 9)
Copy and past your tube inside of the frame then move the tube layer underneath the frame. Add the drop shadow of choice I used 2, 2, 80, 9 then -2, -2, 80, 9. Then I used the plug-in Eye Candy Gradient glow using the below settings ( 3, 25, 83, 50 on the opacity under color).

 Now comes the fun part choosing and positioning your elements. I started with the flourish and used the deform tool to re-size and position
place below the paper frame, duplicate and position toward the bottom of the frame, use my tags as a guide if you like
Ribbon 4 adjusted the hue and colorized then used the deform tool to re-size and place,
I used gradient glow to match what was used on the tube, then duplicated it and mirrored and
flipped it and placed under at the top the flourish use my tag as a guide
Then Butterfly 2 re-sized 45, rotated using the deform tool then the same gradient glow as above.
Re-size as you like,
Add your copyright information and your name and you are done!
Now comes the fun part choosing and positioning your elements. I started with the flourish and used the deform tool to re-size and position
place below the paper frame, duplicate and position toward the bottom of the frame, use my tags as a guide if you like
Ribbon 4 adjusted the hue and colorized then used the deform tool to re-size and place,
I used gradient glow to match what was used on the tube, then duplicated it and mirrored and
flipped it and placed under at the top the flourish use my tag as a guide
Then Butterfly 2 re-sized 45, rotated using the deform tool then the same gradient glow as above.
Re-size as you like,
Add your copyright information and your name and you are done!
Thursday, July 22, 2010
Sophisticated...
 This tutorial is for those that have a working knowledge of PSP.This tutorial was written entirely by me and any resemblance to any other is purely coincidental. I used PSP 9, but any version should work.
The materials you will need:
This tutorial is for those that have a working knowledge of PSP.This tutorial was written entirely by me and any resemblance to any other is purely coincidental. I used PSP 9, but any version should work.
The materials you will need:
Scrap kit: I used JuciyBits kit Sophisticate that you may find HERE
Tube or tubes of choice: I chose the artwork of Jennifer Janesko
A license is required to use her work. You may purchase one at CILM.
Font of choice: I used Aphrodite Pro
Let's start...
Open up a new image 700 x 700 You may re-size later.
Copy and paste frame of choice I chose frame 2
Using your magic wand click inside the frame
Choose a paper my choice was paper 6, Click Selections, Invert, Delete, Select none
add a drop shadow that suits the frame choice I chose 2, 2, 100, 2 then -2, -2, 80, 6
Using the magic wand again on the frame layer, click inside the frame Selection, Modify, expand by 2
Copy and paste your tube of choice adjust to fit within the frame as you desire
Click Selections, Invert, Delete, Select none
You may add a drop shadow here as well
Move both the paper layer and the tube layer under the frame.
You may now add elements of your choice for embellishment.
I chose to add Ribbon 2 re-sized 65 with a drop shadow of 2, 2, 100, 2 then -2, -2, 80, 6
Then Leaf 2 with a drop shadow 2, 2, 80, 2 then -1, -1, 80, 5, then Duplicate, rotate copy 70,
Then brad 01 re-sized 65
I also chose glitter 2 which I colorized to match a color from my tube
(to do this go to adjust, Hue and Saturation, colorize)
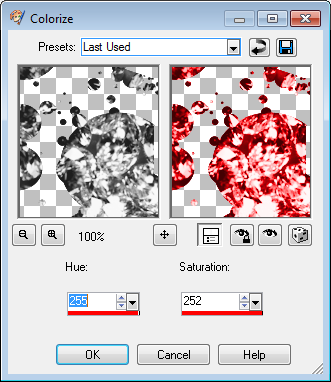 I placed Glitter under my frame layer, duplicated,
mirror image, then flipped. I added a drop shadow here as well.(-1,-1,80,5)
Now add your copyright information, re-size and and add your name you are all done.
Thank you for completing my tutorial.
Here is one of the results sent to me from this tutorial.
I placed Glitter under my frame layer, duplicated,
mirror image, then flipped. I added a drop shadow here as well.(-1,-1,80,5)
Now add your copyright information, re-size and and add your name you are all done.
Thank you for completing my tutorial.
Here is one of the results sent to me from this tutorial.
 I placed Glitter under my frame layer, duplicated,
mirror image, then flipped. I added a drop shadow here as well.(-1,-1,80,5)
Now add your copyright information, re-size and and add your name you are all done.
Thank you for completing my tutorial.
Here is one of the results sent to me from this tutorial.
I placed Glitter under my frame layer, duplicated,
mirror image, then flipped. I added a drop shadow here as well.(-1,-1,80,5)
Now add your copyright information, re-size and and add your name you are all done.
Thank you for completing my tutorial.
Here is one of the results sent to me from this tutorial.

Monday, July 19, 2010
One Hot Chick

This tutorial is written for those that have a working knowledge of PSP.
I used PSP 9 but any version should work.
You will need
Template by me you can get it HERE
Tube of choice, I used the Art of Anthony Guerra
You need a license you may purchase from CILMPlug-in: Eye Candy 4000
Font of choiceOpen your template and delete the copyright layer
Select circle layer use HSB Noise on a setting that suits you, I used these settings: 25,18,64,14,89.60,53.72 then
select all, float, de-float,
Paste as a new layer your tube (re-sized larger to fit the circle) invert, delete, select none.
Duplicate this layer, blur, Gaussian blur 3.00
go back to your first tube layer change properties to Luminance(Legacy)
Return to your copy layer and change properties to soft lightReduce visibility of both layers to suit your taste I used 6o for both.
Now go to your flames layer and adjust to your liking and use HSB Noise on a setting that suits you,
I used the settings above then I reduced visibility to 74
Highlight the small wave layer select all, float, de-float,
Paste as a new layer your tube invert, delete, select none, add a drop shadow of your choice.Paste another copy of your tube over that add drop shadow of choiceUse the eraser tool to erase any portion of the tube hanging over the edge of the small wave.
Now go back to your small wave layer Using HSB Noise on a setting that suits you,
I used these settings above with a random seed, now duplicate the small wave layer
and use your deform tool to make it smaller and use Flame to create fire
now use your eraser tool to remove any aspects the overlap onto the black wave layer
Click on your word Art and apply the HSB Noise using the same setting as above,
but clicking on random seed until it suits you. Adjust the word art to suit your liking.
Re-size as you desireApply your copyright information, add your name and save.
Thank you for trying my tutorial.
Here are some of the results that have been sent to me for this tut.




Monday, July 5, 2010
I'm back

 You can download the word art here.
Subscribe to:
Posts
(Atom)

Licenses I hold


CLOSED STORES:


Counter
|


