My Blinkies


Stuff


Designers I CT for

Blogs I support

CU Licenses I hold


Networked Blog
Blogroll
-
-
-
Festive Wordart for You5 months ago
-
Dayz of Summer - Tagger8 months ago
-
-
Country Christmas 20202 years ago
-
Blessed2 years ago
-
-
-
StellaFelice7 Taggies6 years ago
-
February 2020 New Releases6 years ago
-
-
MB&SW Masks 126 and 1276 years ago
-
MASKS #21 and 227 years ago
-
-
CA Girl Exclusive - kit8 years ago
-
-
-
PTU KIT SUMMER CITRUS10 years ago
-
STORE CLOSING DOWN SALE11 years ago
-
Gothic Ashley CT Results11 years ago
-
Rocking Shamrocks11 years ago
-
HELLO AND HAPPY NEW YEAR11 years ago
-
-
Glorious Autumn11 years ago
-
Announcement12 years ago
-
4 New Animations12 years ago
-
New Packs/Kits up in Zone Store ..12 years ago
-
New kit!! "Girlie Girl"12 years ago
-
***Dnscraps, Little Crown***12 years ago
-
"Hope for Brady" 2013 Blog Train!13 years ago
-
Lucky Me - Tagger Size13 years ago
-
Sweet Love PTU13 years ago
-
sassandswagtemps13 years ago
-
CT Tag and New Template13 years ago
-
Serg Grafik satc “All You Need is Love”13 years ago
-
Sexy Biker Babe - Kit By NAC13 years ago
-
Pirates Wanted - tag13 years ago
-
SWA is Re-Opening !13 years ago
-
Blogwear Design TOU14 years ago
-
-
♥Miraculous Moment♥15 years ago
-
-
-
-
-
-
-
-
-
-
Monday, August 29, 2011
Erotic (PTU)

This tutorial was written entirely by me using PSP9 (any version should work), any resemblance to any other is purely coincidental.
This tutorial is intended for those with a working knowledge of PSP, but should also aid a beginner.
Materials needed:
Tube of choice: I chose the art of ©Ismael Rac, you need a license to use his work and it may be purchased here.
Scrap-kit of choice: I used ~ Burlesque~ by CBJ Scraps
Mask of choice: I used one I made and you may download it here.
Font of choice: Harlow Solid Italic (FTU)
Filters:Lokas 3D shadow
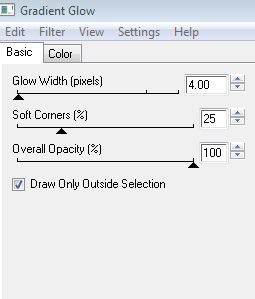
EyeCandy 4000 Gradient glow
Let's begin:
Open a new Image 750x750, you may resize later.
Copy and paste as a new layer a paper from your kit. I chose paper 12, choose one that will compliment your tube.
Apply your mask, Layers, Load/Save mask then merge the group, (merge, merge group).
Next I used the chaise lounge from my kit and resized 50 added the Lokas 3D for a drop shadow,with these settings

if you don't have this filter you could simply use your drop shadow and play with the settings.
Next I used fabric drape resized 50 and used free rotate to the right 5 then added Lokas.
Now to help set the tone for my tag I used the purple boa, and resized 60 rotated to the right 5 then added Lokas, then duplicated this layer and moved the original under the chaise lounge layer.
Now using the erase tool to erase parts of the duplicated layer to make the boa look draped over your fabric and your chaise.
Next place your tube as desired for the tone of your tag, add your Lokas or drop shadow.
Now take the money layer resize 40 and place between the chaise layer and the fabric layers of your tag.
Position this layer as desired and add a gradient glow in a complimentary tone from your tube or your kit, with these settings.

Now take elements of your choice and resize between 40-60 as needed to suite your tag, or you may use my tag as a guide.
I used the condom resized 40, the cigarettes resized 40, and the champagne resized 60 to the cigarettes and the condom I added the Lokas, and to the champagne I added gradient glow with the above settings then Lokas.
Next I took the Burlesque shape and resized 50 and added the same gradient glow.
The Present is next, resized 20 then used the deformed tool to fit into the tag again I added the gradient glow then the Lokas.
Next I used the Burlesque lips2 resized 50 twice then used my erase tool to make a lipstick smear on the champagne.
The Pink Burlesque bottle is the next element resized 50 twice then 70 gradient glow added then Lokas then transparency adjusted to 80.
Finally I added the Bracelet resized 35 and rotated to the right 10.
Now resize and ad your copyright. Add your name and You are done.
Thank you for trying my tutorial.
Sunday, August 28, 2011
Heaven (PTU)

This tutorial was written entirely by me using PSP 9 (any version should work).
Any resemblance to any other is purely coincidental.
This tutorial is meant for those with a working knowledge of PSP but should be easily understood by a beginner.
Materials needed:
Scrap kit of choice: I used ~ A Letter from Heaven ~ by Tootypup Scraps
Tube or tubes of choice: I used the art of ©Pinuptoons. You need a license to use his work,one may be purchased at CDO.
Mask of choice: I used a mask I made you may download it here
Font of choice: I used Jaunty Gent NF (PTU)
Filters: Lokas 3D shadow
Let's begin!
Open a new image 750x750, you will resize later.
Choose a paper from your kit I chose paper17 apply your mask, Layers, Load/Save mask, then merge, merge group.
Next I chose window 4 resized 70 I added Lokas 3D shadow with these settings.

You may also use the deform tool to help achieve the desired result.
Now I used the Letter from Heaven2 bird resized 25 with the same settings for loka.
Now using Ribbon 5 I resized 50 and used the manual color correction tool to match a lighter purple in element Book2 which will be placed next.
Position books 2 as desired resize 70 and apply Lokas.No resize Deco 8 apply Lokas and position as desired.
Now using hearts5 resized 60 place. You may place your tube or tubes now.I added Lokas with these settings.

I rearranged my elements to suit my tubes at this point.Positioning many of the elements beneath my tubes to compliment.
I duplicated the ribbon layer and move the duplicate layer above the letter/bird layer and used my erase tool to help blend together.
Now resize and add your copyright. Add your name and you have completed my tutorial.
Thank you for trying my tutorial.
Saturday, August 27, 2011
Goth Christina (PTU)

This tutorial was written entirely by me, for those with a working knowledge of PSP.
Any resemblance to any other is purely coincidental. PSP 9 was used while writing this tutorial, but any version should work.
Materials needed:
Tube of choice: I used the art of ©DiMary, an exclusive tube from PFD. You need a license to use this art you may purchase one here.
Scrap-kit of choice: I used Christina2 by Wicked Princess Scraps
Mask of choice: I used on that I made and you may download it here if you'd like.
Font of choice: I used A Charming Font
Filters:
EyeCandy 4000 Gradient Glow
Lokas 3D shadow
Let's begin!
Open a new image 750x750, you will resize later.
Copy and paste a paper of choice into your image I used paper 8.
Apply a mask to your paper, Layers, Load/Save mask, then merge, merge group.
Next copy and paste your tube as a new layer and adjust your size as needed to fit your tag, add your drop shadow of choice, I used 3,3,65,6 color black.
Duplicate this layer and close the duplicate. on the original tube layer apply the same mask you used for your tag, using the same steps as above.
Next reopen your duplicate layer, and using your erase tool erase the lower bits of your tube to fit the blend made by the masked tube layer.
Now it is time for elements. Choose elements that compliment your tube and that suit you, or you may use my tag as a template.
The first element I chose was the lace heart resized 20, add a drop shadow and a gradient glow if desired.I used thin, 3,25,100.
When placing elements don't forget that your erase tool helps work elements into your tag. so for the lace heart erase bits of the element to blend with your tube.
Next I chose the Book element,resize 40 with the same drop shadow as above.
Next I chose the Goblet resized 30 and applied the drop shadow and a gradient glow.
Next I used the dragon bowl resized 35, and used Lokas 3D on it for the shadow with these settings.

Again you may use whichever elements from your chosen kit and place as you desire, this is about creativity.
Next I resized the Gargoyle 60 and used Lokas again with the same settings.
Next I used Rose2 resized 15 and applied Lokas again with the Gradient glow from above.
Now I take the ribbon element and resize 35 and place to compliment my other elements adding the Lokas and the gradient glow.
I duplicate this layer and use the duplicate to compliment my gargoyle as well.
Next take the SinnerSaint Cherry and resize to compliment your tag, also using the deform tool so it fits as you desire.
Repeat these steps with the Jesterskull.
Finally I added the building element and placed just above the mask layer with the Lokas and Gradient glow filters applies.
Now resize and add your copyright. Add your name and you are done!!
Thank you for trying out my tutorial.
Here is a sample of the same tutorial using different elements from this kit and a different tube.

Wednesday, August 24, 2011
Subliminal (PTU)


This tutorial was written entirely by me. Any resemblance to any other is purely coincidental.
PSP9 was used when writing this tutorial, but any version should do. This tutorial is intended for those with a working knowledge of PSP.
Materials you will need:
Tubes of Choice: I used the art of ©Dark Yarrow. You need a license to use her work, you may purchase it at DSI.
Scrap Kit of Choice: I used ~Dark vs Light~ by CBJ Scraps
Mask of Choice: I used mask 71 by Insatiable Dreams
Font of choice: I used Honeybird (PTU)
Filters: EyeCandy 4000 ~ Gradient Glow & HBS Noise~
Animation shop
Let's get started
Open a new image 750x750, don't worry you can re-size later.
Choose a glitter from your kit I chose the white to start, copy and paste into your image as a new layer.
Next chose a different color glitter from your kit resize 80. Now copy and paste a paper from your kit I chose paper10.
Now you apply your mask, click layer Load/Save mask then apply. Now go to merge, merge group.
Next take your close up tube and copy and paste as a new layer apply the same mask to the tube just as before.
now you will adjust your settings on your close up to fit against your primary mask layer I changed opacity to 90.
Now duplicate this layer twice if you plan to animate.
Now you place your full tube and position as you like to compliment your closeup add the drop shadow of your choice I used 3,3,60,13.Duplicate this layer.
Take your Doodle edge2 and place between the two tube layers Add a gradient glow of your choice, I used 3,25,100, (Thin). .Use your Deform tool to adjust as you need for size.
Using your erase tool erase which ever parts of the duplicated layer to suit your desire to enhance your tube.
Next take the light ribbon and resize 80 then use your deform tool to position as you'd like to compliment your tube.
Or you can use my tag as a reference.Add your drop shadow to each comig layer, I used the same as above.
Now take your clock and resize 70 position as desired, add your drop shadow.
Now take the heart ribbon and use the deform tool to position around your clock add your drop shadow and a gradient glow.Duplicate this level.
Move the original heart ribbon under your clock layer, now on your duplicated layer use your erase tool to make the ribbon wrap around the clock.
Now take both your paper roses and resize 50 and use the deform tool to adjust to your vision.You may if you like add a gradient glow, I didn't.
Again you may use my tag as a reference if you desire.
Repeat these steps with the Light heart and the White flower.
Resize, add your copyright. if you are not going to animate add your name and you have completed my Tutorial.
Animation:
Go to your close-up group layer open HBS Noise apply these settings.

Now repeat this on each duplicate layer hitting random seed on each layer.
Close off each duplicated layer Copy merged (Shift+ctrl+c) and paste as a new animation (Ctrl+V)into animation shop.
Close the close up group layer open the first duplicated layer Copy merged again and place after current frame (Ctrl+Shift+L), repeat this with the second duplicated layer.
Go back to PSP add your name and whichever filters you'd like copy, go back to AS and paste as a new animation and make 3 frames with it. select all, copy. go to your tag animation select all
paste into current frame and position as desired. Check your animation and save.
You have now completed my tutorial with animation. Thank you for trying my tutorial.
If you use IncrediMail feel free to download the matching Stat.
Saturday, August 20, 2011
A new Template for you...

Well thanks to a Challenge in one of my groups here is a new template for you. I hope you enjoy it! Click the here to download.
Here is the first tags I've gotten using my template.


Wednesday, August 17, 2011
SplishSplash

This tutorial was written entirely by me. Any resemblance to any other is purely coincidental.
PSP 9 was used to write this tutorial, but any version should do.
This tutorial is for those with a knowledge of PSP, but is suitable for beginners as well.
Materials needed:
Tube of choice: I used the art of ©PinUpToons. You need a license to use this work and you may purchase one at CDO.
Scrap-kit of choice: I used Poolside Cafe by Kia Glitz Scraps.
Font of choice: I chose Summertime.
Filter: EyeCandy 4000 Gradient Glow
Let's begin.
Open an image 705x750 don't worry you will re-size later.
Now Open a paper from your kit, I used paper 26. If you choose, you may use a mask on this layer or even cut the paper into a shape as desired.
Now you may place your tube and add a drop shadow I used 3,4,60,13.
Next take some glitter elements and place under your shaped paper. Position as desired or use my tag as a template.
Now use your splashes from your kit and place beneath your tube to suit the idea of your tag.
Next open your lifesavers element and choose as many as desired for effect in your tag, add a drop shadow if desired.
Next choose the sunglasses element and choose your color and place to compliment your tag.
Place the signpost resize 50 under the glasses layer and add your desired drop shadow, I used the same drop shadow as on my tube for both glasses and sign post.
Now choose some word art from your kit and place adding a gradient glow to suit your vision.
Now resize, add your copyright, add your name and you are done.
Thank you for trying my tutorial. I'd love to see your results to post on my blog.
Tuesday, August 16, 2011
Summer

This tutorial was written entirely by me. Any resemblance to any other is purely coincidental.
PSP 9 was used to write this tutorial, but any version should do.
This tutorial is for those with a knowledge of PSP, but is suitable for beginners as well.
Materials needed:
Tube of choice: I used the art of ©Caron Vinson. you need a license to use her work and you may purchase one at CDO.
Scrap-kit of choice: I chose ~Surrendering Summer~ by Alikas Scraps.
Mask of choice: Mask 362 by WeeScotsLass
Font of choice: I chose Mutlu Ornamental.
Let's begin.
Open an image 705x750 don't worry you will re-size later.
Choose a paper from your kit I chose paper 6 copy and paste into your image then go to Layers, Load/Save Mask, then merge, merge group.
Next I chose one of the triple frames (as73) and re-size by 120 then free rotate to the left 25.0.Now add the drop shadow of your choice, I used 5,5,65,15.
Now add your tube as desired or you may use my tags as an example.You may add your drop shadow as desired (I used 4,4,65,14) then duplicate to adjust around your frame.
Move your tube layer under the frame then click on your duplicated layer and use your erase tool to suit your needs.Next place you grass layer(as49) re-size 90 and add a drop shadow, I used 3,3,60,12.
Duplicate this layer as well moving one under your frame and original tube layer, erase bits of the top layer of as49.Repeat this with a ribbon (as30).
Next choose some flower elements I chose as90 re-size 80, then as127 re-size 80 then duplicated and re-size 70 and duplicated again, each layer with a drop shadow of 3,3,60,12.
Position your flower layers as desired and duplicate and re-size as desired to suit your tag.
Next choose another ribbon layer I chose as99 re-size 70 and drop shadow same as above. Now duplicate and erase areas in order to surround your flowers as desired, using the erase tool and instructions as above.
Add a heart element as110 with a drop shadow of 3,3,60,12.
Next I chose a dragon fly element as122 re-size 40, and added the last drop shadow to this element too.
Next using butterfly as44 re-size 50 and drop shadowed with the last setting.
Finally add sparkles (as120) just above your group layer and duplicate to position both layers as desired.
Now re-size, add your copyright, add your name and you are done.
Thank you for trying my tutorial. I'd love to see your results to post on my blog.
Saturday, August 13, 2011
Emolution

This tutorial was written entirely by me. Any resemblance to any other is purely coincidental.
I used PSP9 when writing this tutorial, but any version should work.
Materials needed:
Scrap-kit of Choice: I used ~Emolution(from the heart)~ by Designs by Stina
Mask of Choice: I used mask 306 by WeeScotsLass
Tube of Choice: I used the art of verymany. You must have a license to used this art and you may find it at PFD
Font of Choice: Tommytxtey#4
Filters: Gradient Glow EyeCandy 4000
Lets get started:
Open a new image 750x750, don't worry you will resize later.
Choose a paper from your kit copy and paste into your image.Click on Layers, then Click on Load/Save mask. then click merge, merge group.
Next start choosing elements from your scrap-kit. I started with glitter 5 and placed behind my mask/group layer.
Now I place wire 2 between the mask/group layer and the glitter layer.
next I took the pink and the purple doodle layers and placed over my wire layer and adjusted to my liking, then mirroring one then flipping it.
Next I chose winged heart one and two and resized them 30. Place elements into position to your vision or you may use my tag as a guide.
Add a drop shadow of 3,3,65,12 to each element, then a gradient glow of your choice to compliment your tag. (I used settings 5,25,100, thin),
Next I resized the boom box & purple boots 40, and the 3 of the lips 25, 2 of the skulls 25 and placed. Choose colors that compliment your tube.
You can place your tube now or at any time to help with element placement.
Next resize the hat 25 and place to suit you or you can use my tag as a guide.to rotate the hat on an angle use free rotate to the right25.
Next the metal flowers & skulls are resized 20 and adjusted. add the drop shadow and gradient glow as desired, you may even like to vary the shadow and glow used.
You may place some of the word art from your kit if you feel it works for your tube.
Now resize, add your copyright, add your name and you are done.
Thank you for trying out my tutorial.
Friday, August 12, 2011
Obsession

This tutorial was written entirely by me. Any resemblance to any other is purely coincidental.
I used PSP 9 to write this tutorial, but any version should do.
Materials needed for this tutorial are:
Tube of choice: I chose the work of Ida Larsen. You need a license to use her work which you may obtain at DSI
Scrap kit of choice: I chose a kit by Angel Designz ~ Gothic Obsession~
Font of choice: I used Dagger Rob which is a PTU font.
Filters: Gradient Glow Eye Candy 4000
Let's begin:
Open a new image 750x750, don't worry you will resize later.
Usually we would pick a paper and go from there, but this time we are going to start with a kit element. I started with the Tag back element from this kit and resize 115.
If you would rather use a paper with a mask this would be great too. Just add your paper and apply your mask using layer then load save mask.
Now is the really fun part of choosing elements from your kit.I decided to add the Splatter element underneath my tag back layer,arrange as desired.
I duplicated this layer twice mirroring one layer and flipping the other. Adjust as you desire or you may use my tag as a guideline, this stand for any element I use.
Next I placed my tube, Adjust if needed to fit your tag theme, go to adjust, Hue and Saturation, Hue map and adjust lightness or saturation as desired.
Next I added a drop shadow 3,3,75,12 then a gradient glow 5,25,100 thin and a color from your tube or your kit that compliments the tag.
Next I added the Ribbon 1 resized 50 element under my tube layer adding the same drop shadow as before as well as the same gradient glow.
Next duplicate this layer and mirror as desired to fit your tag. Adjust the elements as desired.
Next I added the cross and resized 25, above my ribbon layer, but again use the elements you like and resize to fit your tag.
Now add the crow and skull element resized 30 mirror and add your same drop shadow and gradient glow.
Next add the rose layer adding the same filters as listed.Duplicate and mirror to suit your tag.
Now resize the key 25 and place as desired to compliment your tag and add the same filters.
Now resize the spider 15 and the rat resized 20 and place as desired with the same filters.
Now resize, add your copyright, your name and you are done.
Thank you for taking the time to try my tutorial.
Monday, August 8, 2011
Wow where did the time go?
I've been trying to get on here to post something on here for my few followers. I'm sorry that I have not posted any new tuts or freebies in a bit. I've been really busy with real life this summer. My kids have kept me busy along with school. I'm hoping to get something out to you all this week.
I have done so stress relief tagging though here are a couple of my favs that I may decide to tut up. I hope your summer is going well and I'll be posting more soon.


Subscribe to:
Posts
(Atom)

Licenses I hold


CLOSED STORES:

Counter
|